Yes, you can waterproof your pergola and create an all-weather retreat. Choose from retractable canopies for flexible protection, permanent roof covers like polycarbonate or metal panels for complete waterproofing, or budget-friendly shade sails for light rain. For wood pergolas, clean thoroughly, wait for complete drying, then apply sealant between 50–80°F in dry conditions. Maintain your protection every 1–3 years with inspections and resealing. Each method extends your structure’s lifespan decades longer than leaving it exposed.
Can You Actually Waterproof a Pergola? (Yes, Here’s How)

Ever stood under your pergola during a rainstorm and wished it could actually keep you dry? Good news: you’re not alone, and waterproofing is absolutely possible.
Your pergola doesn’t have to stay semi-open. Waterproofing is absolutely possible with the right methods.
Your pergola doesn’t have to stay semi-open. You can add protection using several methods. Retractable canopies roll out when needed. Polycarbonate panels create solid coverage. Shade sails offer lighter protection. Treated wood with sealants work too.
The process starts simple. First, assess your local climate and rainfall patterns. Then choose your waterproofing method based on how much rain protection you need. Some solutions work better for light showers. Others handle heavy downpours.
Next, clean and prepare your pergola thoroughly. Follow installation guidelines carefully or hire professionals. The right approach protects your space while maintaining its character. You’ll join countless homeowners who’ve successfully converted their pergolas into functional all-weather retreats.
Extend Your Pergola’s Lifespan and Protect Your Patio Investment

Why do so many homeowners neglect their pergolas until damage becomes expensive? Waterproofing your pergola now saves money later. Wood rots. Metal rusts. Deterioration spreads fast.
You’re protecting your patio investment by acting early. A sealed pergola lasts decades longer than an unprotected one. Rain exposure damages materials constantly. Waterproofing creates a barrier against this damage.
Choose the right protection method for your materials. Sealants work for wood. Paint works for metal. Covers shield everything underneath. Each approach extends your structure’s life significantly.
Maintenance matters too. Clean debris regularly. Inspect seals annually. Reapply sealant every few years. These simple steps keep your pergola strong.
Your backyard space becomes a lasting retreat. You’ll enjoy it without worry for years ahead. That’s smart homeownership.
Retractable Pergola Canopies: The Flexible Waterproofing Solution

While permanent sealants and protective coatings keep your pergola structure sound, they’re only part of the waterproofing equation. A retractable canopy system gives you something different. You control when coverage happens.
These systems work by combining adjustable fabric or panels with motorized or manual operation. You extend them during rain. You retract them for open-sky enjoyment. This flexibility beats fixed solutions because weather changes constantly.
Installation involves mounting rails onto your existing pergola framework. The fabric panels attach securely. Once extended, they provide weatherproof and reliable protection.
Maintenance keeps everything running smoothly. Clean the fabric regularly. Retract fully during heavy winds. Check that the retraction mechanism stays unobstructed.
You’re creating a protective layer you can customize daily. That control transforms your patio into an adaptable outdoor space.
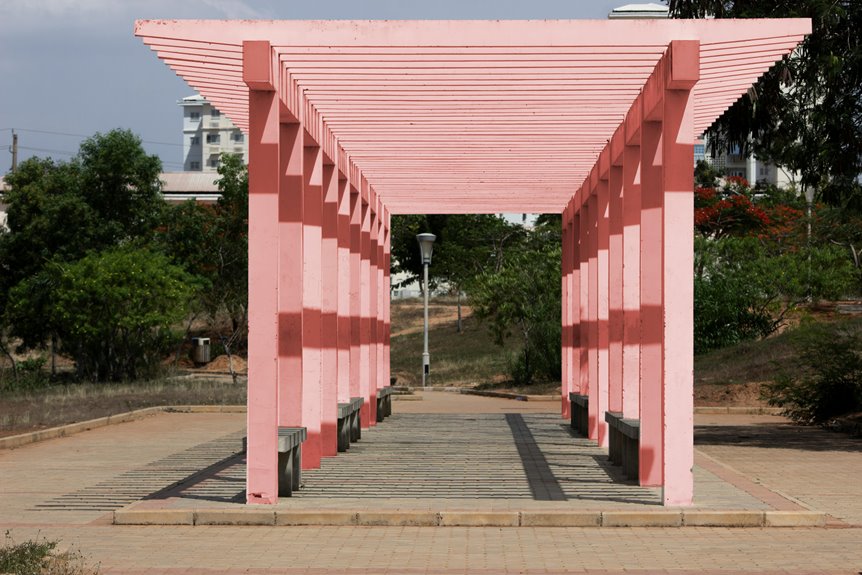
Permanent Roof Covers: The Most Waterproof Pergola Option

When you install a solid roof on your pergola, you’re choosing durability that lasts. Materials like polycarbonate and acrylic panels resist cracking, UV damage, and weather wear for 10-20 years with minimal maintenance. You’ll want to understand proper drainage design and weight distribution during installation so your permanent cover performs reliably for decades.
Solid Roof Installation Benefits
Permanent roof covers represent your best defense against water damage. You’ll gain complete protection from rain, snow, and harsh weather conditions that threaten your outdoor space. A solid roof installation transforms your pergola into a reliable shelter you can depend on year-round.
What you’re getting:
- Complete waterproofing that blocks all precipitation without gaps or weak spots
- Integrated drainage systems that direct water away safely and efficiently
- Enhanced structural durability designed to handle heavy weather loads and stress
When you choose this option, you’re joining homeowners who’ve eliminated weather worries entirely. Professional installation ensures proper load distribution and weatherproofing. You’ll also add lighting and insulation features that make your space usable regardless of season. It’s the investment that continues to deliver value.
Material Durability and Longevity
Durability is where permanent roof covers truly separate themselves from temporary solutions. You’re investing in materials built to last decades. Polycarbonate panels resist UV damage and maintain clarity. Solid roofing options withstand extreme weather without degrading.
| Material | Lifespan | UV Resistance | Maintenance |
|---|---|---|---|
| Polycarbonate | 10-15 years | Excellent | Minimal |
| Metal Panels | 20-30 years | Superior | Low |
| Composite Sheets | 15-20 years | Very Good | Moderate |
| Acrylic Panels | 8-12 years | Good | Moderate |
| Aluminum Sheeting | 25+ years | Excellent | Very Low |
Your waterproofing protection improves with proper installation. Secure attachment to corrosion-resistant aluminum frames prevents wind-driven leaks. Quality drainage systems direct water away efficiently. You’ll avoid repetitive sealant reapplication that temporary solutions demand. This permanence means fewer repairs and lower long-term costs. Choose materials matching your local climate for optimal performance.
Shade Sails and Fabric Covers: Budget-Friendly Options

How’d you like to protect your pergola affordably?
Shade sails and fabric covers offer an economical solution. They attach easily to existing posts and beams. Installation requires minimal structural changes. Your open-sky feel remains intact.
Shade sails and fabric covers attach easily to existing structures with minimal changes, keeping that open-sky feel intact.
These options work best for:
- Light rain protection and sun shading
- Quick installation with fewer expenses
- Flexible design choices in multiple colors
Fabric covers aren’t ideal during heavy downpours. They’re perfect for moderate weather though. You’ll appreciate the cost savings compared to solid roofing systems.
Maintenance keeps everything running smoothly. Clean regularly. Inspect for wear and tear. Tighten attachment points periodically. These simple steps prevent leaks and extend your cover’s lifespan.
You’re joining countless homeowners choosing economical waterproofing. It’s practical. It’s smart. You’ll like the results.
Polycarbonate and Acrylic Panels: See-Through Rain Protection

While shade sails let you enjoy open skies with basic protection, polycarbonate panels take waterproofing further. You get transparent coverage that blocks rain while keeping natural light flowing through your pergola. These panels are lightweight and impact-resistant. They won’t shatter easily during storms.
You’ll find panels in different thicknesses and opacity ratings. Thicker versions offer better UV protection and glare reduction. Multi-wall configurations improve insulation and help water drain properly.
Installation requires attention to detail. Seal all panel edges carefully to prevent leaks from developing over time. Add drainage channels underneath for extra protection. Cut your polycarbonate panels to fit irregular shapes if needed. This flexibility makes them work with any pergola design you’ve chosen.
Waterproofing Wood Pergolas: Sealants, Stains, and Timing

You’ll need to prep your wood pergola properly before any sealant touches it. Start by cleaning the surface thoroughly and letting it dry completely, since moisture underneath will compromise your waterproofing job. Timing matters too—pressure-treated pine requires 2–6 months of drying after assembly, while cedar can be treated right away if you prefer.
Preparation and Surface Readiness
Preparation and Surface Readiness
Why does prep work matter so much? Skipping preparation sabotages your entire pergola protection project. You’re investing time and money. A properly prepared surface ensures sealants and stains bond correctly.
Start by gathering essential supplies:
- Cleaning rags, brushes, safety gear, and drop cloths
- Ladder and protective coverings for surrounding furniture
- Materials for addressing dirt and debris removal
Your pergola must be completely dry and free of surface dirt before applying anything. Check every beam and corner thoroughly. Remove accumulated leaves, dust, and organic growth.
Protect surrounding areas with drop cloths. This prevents accidental staining of landscaping or hardscaping. Work systematically and inspect each section carefully.
Temperature matters too. Aim for 50–80°F for best results. You’re setting the foundation for lasting protection that keeps your pergola in good condition for years ahead.
Selecting Appropriate Sealant Products
Now that your pergola’s surface is clean and ready, it’s time to pick the right sealant. You’ll want a wood-specific sealant designed to handle moisture, UV rays, and temperature shifts. These specialized products protect your investment far better than generic options.
Consider your climate when choosing. Harsher environments need stronger protection. Transparent or semi-transparent stains preserve your wood’s natural grain while offering UV defense—a practical combination.
Check the application window too. You need temperatures between 50–80°F with a dry surface for optimal results. This timing matters more than you’d think.
Quality sealants vary significantly. Read labels carefully. Some products excel at moisture resistance while others prioritize UV protection. You’ll reapply every 1–3 years anyway, so choose something reliable now.
Application Timing and Weather Conditions
Before you open that sealant can, timing is everything. You’ll want to check both the temperature and weather conditions before applying any product to your pergola. What you need to know:
- Apply stain or sealant between 50–80°F (10–27°C) for best results
- Make certain your wood is completely dry before starting. This matters most with pressure-treated pine, which needs 2–6 months to dry after assembly
- Plan for a rain-free window of 24–48 hours after application
Wet or damp wood won’t accept stain properly. Skipping the drying step will compromise your results. Check weather forecasts carefully. Avoid applying during humid conditions or when rain’s predicted. Once you’ve sealed or stained your pergola, reapply every 1–3 years depending on your climate. This maintenance schedule keeps your investment protected and looking great for years.
Wood vs. Metal: Material-Specific Waterproofing Strategies

How you waterproof your pergola depends entirely on what it’s made of.
Wood pergolas require significant waterproofing attention. Apply sealants or stain to protect against moisture damage and color fading. Pine requires 2–6 months of drying time before sealing. Cedar dries faster. Always stain top-to-bottom in a dry window between 50–80°F to prevent drips. Plan to re-stain every 1–3 years depending on your climate and product quality.
Wood pergolas need regular staining every 1–3 years to prevent moisture damage and color fading.
Metal pergolas resist moisture naturally. However, protection remains important. Apply corrosion-resistant coatings and exterior-safe sealants to prevent rust formation. Powder-coated finishes deliver excellent durability. Inspect metal regularly for chips or corrosion spots. Recoat as needed to extend your pergola’s lifespan.
How to Install Weatherproof Panels or Retractable Covers: A 5-Step Process

Installing weatherproof panels or retractable covers converts your pergola from a partial shelter into genuine rain protection. Many homeowners have upgraded their outdoor spaces using this method.
Start with these essential steps:
- Assess your pergola’s structure and measure dimensions accurately
- Choose between polycarbonate panels for light transmission or fabric covers for affordability
- Prepare surfaces by cleaning and checking framing compatibility
Next, prepare your pergola surface thoroughly. Remove debris and inspect existing framing for damage. Install weatherproofing materials according to manufacturer guidelines or hire professionals for complex projects.
Seal all joints meticulously to prevent water infiltration. Test your installation by running water across panels and checking underneath for leaks. Proper sealing protects your investment and maintains long-term performance.
Don’t Forget Gutters: Why Drainage Matters Most

You’ve sealed your panels and tested for leaks, but water still finds its way down. That’s where gutters become your practical ally.
Gutters direct rainwater away from your pergola’s posts and foundation. Without them, you’re inviting moisture damage and structural rot. Think of gutters as your pergola’s protection against water infiltration.
Proper gutter placement and angle are important. Water needs to flow smoothly toward downspouts without pooling anywhere on the structure. Size your gutters to match your pergola’s footprint and local rainfall intensity.
Regular maintenance keeps everything working. Remove leaves and debris regularly to prevent clogs that cause overflows. Connect your gutters to downspouts and drainage systems that direct water away from the foundation.
You’re protecting your investment. Smart drainage planning means your pergola lasts decades, not years.
Staining and Sealing Wood Pergolas: Timing and Best Practices

You’ll need to get the timing right before you even think about staining or sealing. For pressure-treated pine, you’ve got to wait 2–6 months after assembly until the wood is completely dry, while rough sawn western red cedar can be stained immediately if you prefer. Your wood preparation matters just as much as timing—make sure the surface is completely dry, dirt-free, and gently brushed clean before you apply anything.
Timing Wood Preparation Properly
When should you stain or seal your new pergola? The answer depends on your wood type and drying time. Pressure-treated pine requires 2–6 months of complete drying before accepting stain or sealer. Watch for that golden brown color—it indicates the wood is ready. Rough-sawn western red cedar offers flexibility; you can seal it immediately if you prefer.
Before you begin, prepare properly:
- Ensure wood is completely dry and dirt-free
- Brush off surface debris with a soft cloth or brush
- Let lightly rinsed wood dry fully before starting
Temperature matters too. You’ll want conditions between 50–80°F with rain-free forecasts for 24–48 hours after application. This waiting period lets your coating cure correctly. Rushing this prep work compromises your waterproofing job. Planning ahead with proper timing delivers better protection.
Application Temperature And Conditions
What conditions must align before you brush that first coat onto your pergola? Temperature matters greatly. You’ll want 50–80°F (10–27°C) conditions. This range lets finishes cure properly without complications.
Your wood needs drying completely before application. Plan for an extended dry spell beforehand. Moisture trapped inside creates adhesion problems later. After you apply your stain or sealer, you’re not finished waiting. You’ll need a rain-free window of 24–48 hours minimum. Rain during this critical period ruins your work entirely.
Weather forecasting becomes your best friend here. Check predictions carefully before scheduling application day. Humidity matters too—avoid applying during damp conditions. Success depends on respecting these environmental requirements. Rush this step, and you’ll regret it.
Choosing Colors and Finishes That Protect and Beautify
How do you choose a color that looks great while also keeping your pergola safe from the sun? You’re balancing protection with aesthetics. Wood finishes come in two main categories that serve different purposes:
- Transparent stains reveal your wood grain while providing UV protection
- Opaque options hide grain patterns and offer maximum sun defense
- Clear or light-tinted stains deliver a natural appearance with reliable UV shielding
Gray tones coordinate well with stone pavers and outdoor furniture. Light-tinted finishes remain popular for their natural look and protective qualities. Consider your existing house and deck colors when deciding.
You’ll want colors that complement your overall design scheme. Consulting paint and stain specialists helps you select finishes that suit your specific roof or canopy. They’ll recommend products matching your climate and aesthetic goals.
Common Waterproofing Mistakes to Avoid

You’re likely to undermine all your waterproofing efforts by skipping surface prep, applying sealant in wrong conditions, or ignoring weather timing. Most pergola failures happen because you didn’t fully dry the wood, remove dirt and debris, or wait for temperatures between 50–80°F before sealing. These three mistakes—rushing preparation, poor application practices, and bad timing—are easily preventable yet they compromise adhesion and curing, leaving your structure exposed to water damage.
Skipping Surface Preparation
Why surface prep matters.
You can’t skip this step. Proper surface preparation is the foundation of waterproofing success. When you rush this process, you’re setting yourself up for failure down the road.
Here’s what happens when you neglect surface preparation:
- Dirt, dust, and old coatings trap underneath new sealants, destroying adhesion
- Moisture prevents proper curing and causes peeling within months
- Surface contaminants create uneven finishes and blotching that ruin your pergola’s appearance
Before applying any waterproofing product, you need to clean thoroughly. Remove all debris using a brush or pressure washer. Let wood dry completely—this usually takes 24-48 hours depending on humidity.
Don’t protect surrounding areas either. You’ll regret staining your deck or patio.
Taking time now prevents expensive repairs later. Surface preparation isn’t glamorous, but it’s necessary.
Applying Sealant Incorrectly
Once surface prep is done, applying sealant correctly becomes your next critical step. You’ll want to match your sealant type to your pergola material—wood needs different protection than metal. Using the wrong formula accelerates deterioration and wastes your effort.
Timing matters during sealant application. Don’t rush between coats. Recoating before the previous layer fully dries causes peeling and bubbling that compromises your waterproofing. Check manufacturer instructions for exact dry times.
Temperature control is necessary too. Apply sealant only between 50–80°F. Colder or hotter conditions reduce cure quality and longevity.
Follow a complete top-to-bottom workflow. Skipping hidden surfaces leaves drips unprotected. Work systematically and methodically.
These sealant application fundamentals protect your investment and keep your pergola performing well for years.
Ignoring Weather Conditions
Weather Conditions and Project Success
Weather conditions directly impact your waterproofing project. Applying sealants during rain or when surfaces remain wet traps moisture underneath. This moisture degrades your coating from within, causing premature failure and wasted investment.
Professionals recommend waiting for specific conditions:
- Temperature between 50–80°F (10–27°C) for proper application
- Completely dry surfaces before any sealant contacts wood or metal
- At least 24–48 hours of rain-free time after completion
Your local climate matters. High humidity and temperature fluctuations cause coatings to crack and peel faster. Check your forecast before scheduling your project. Scheduling without weather data leads to rapid wash-off or diluted coatings. You compromise adhesion and performance immediately. Plan ahead and wait for ideal conditions. Your pergola’s longevity depends on proper timing.
Seasonal Maintenance Checklist: Inspecting, Cleaning, and Resealing

Protecting your pergola requires consistent effort throughout the year. You’ll want to schedule inspections twice yearly. Spring and fall work best for this task.
| Task | Spring | Fall |
|---|---|---|
| Inspect seals | Check for gaps | Assess winter damage |
| Clean surfaces | Remove pollen debris | Clear leaves and dirt |
| Check drainage | Verify gutter system flow | Ensure no blockages |
| Reseal wood | Apply protective coating | Prepare for cold months |
| Inspect coatings | Look for peeling spots | Evaluate wear patterns |
During inspections, examine your gutter system closely. Water pooling causes serious damage quickly. Allow surfaces to dry completely before resealing. This provides proper adhesion and lasting protection. You’ll reapply sealants every one to three years. Follow manufacturer guidelines for your specific material. Metal and wood need different products. Redirect runoff away from your structure consistently.