You’ll want nutrient-rich soil amended with compost, bone meal, and kelp since squash are heavy feeders.
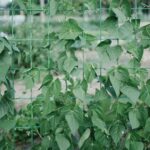
Build a sturdy trellis using cattle panels and 6-foot posts spaced five feet apart, positioned north-south for airflow.
Plant vining varieties like Tromboncino or Butterscotch Butternut after the last frost, spacing seeds three feet apart.
Train six to eight vigorous vines upward with flagging tape, removing ground-level growth to prevent pests and disease.
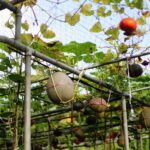
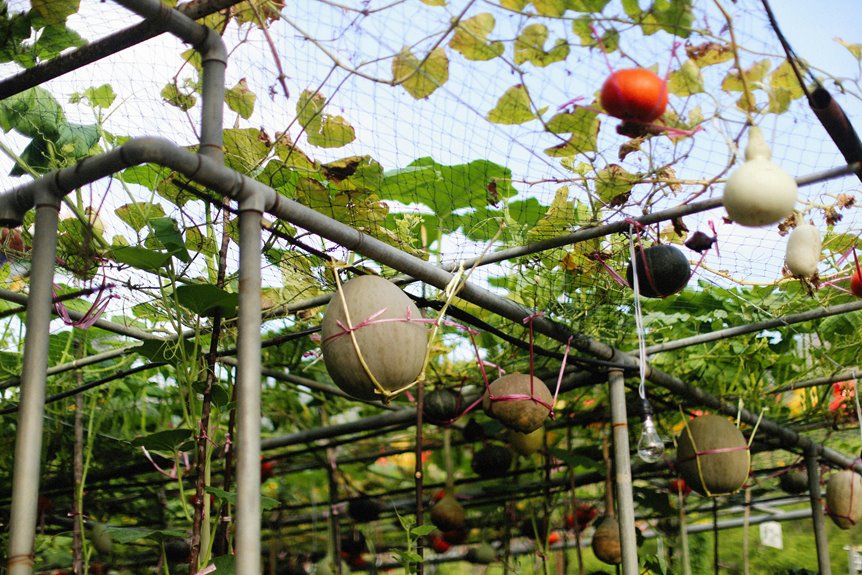
Use fruit slings for support as your squash develops.
Better airflow reduces fungal problems—the specifics matter.
Start With Rich, Nutrient-Dense Soil

The foundation of successful vertical squash growing starts underground. You’ll need rich, nutrient-dense soil that feeds heavy feeders like squash. Mix in organic components: laying hen manure, bone meal, feather meal, sulfate of potash, kelp, and calcium. Add leonardite ore and azomite minerals for complete nutrition.
Before planting, amend your beds deeply. Squash roots penetrate far down, so don’t skimp on depth. Layer compost throughout your soil to create a thick, nutrient-rich base. Good drainage matters too—waterlogged soil invites problems.
This foundation supports vigorous vine growth and larger fruits on your trellis. Your soil investment now delivers consistent results throughout the season, supporting production when your plants need it most.
Build a Sturdy Trellis That Supports Heavy Vines

You’ll need sturdy materials to handle the weight. Cattle panels paired with 6-foot T-posts spaced 5 feet apart create a framework that won’t buckle under heavy squash vines, and you can arrange them as a wall or bend them into protective hoops. Secure everything firmly to solid ground anchors or reinforced frames, then lift the panels about a foot up using wire or zip ties so your vines can move freely while staying off the soil.
Materials And Construction
Most successful vertical squash growers rely on livestock panels and heavy-duty fencing because these materials won’t buckle under the weight of mature vines and fruit. You’ll want cattle panels secured with 6-foot t-posts driven about 5 feet into the ground for maximum stability.
Space your panels roughly a foot off the ground using wire or zip ties. This prevents rot and pest damage. Consider cutting livestock panels in half for easier handling and installation.
Build your trellis as either a wall or tunnel shape. Position it north-south when possible to optimize airflow and sun exposure. Make sure your structure reaches 7 feet tall or higher to prevent crowding and accommodate vigorous vine growth.
These construction choices directly impact your harvest success.
Spacing And Securing Panels
Once you’ve assembled your cattle panels and T-posts, focus on keeping everything stable under the weight of mature squash vines. You’ll need to space panels about a foot off the ground for airflow. This prevents disease and lets you access plants easily.
| Task | Spacing/Height |
|---|---|
| Panel clearance | 1 foot above ground |
| Trellis height | 4–7 feet tall |
| T-post depth | 5 feet into soil |
| Panel separation | Evenly distributed |
Secure panels firmly to T-posts using wire or zip ties. This prevents sagging when vines mature. Proper anchoring reduces maintenance later and supports plant development. Space your trellis panels to avoid crowding. Good spacing keeps air flowing through leaves and reduces pest problems.
Select Vining Squash Varieties Built for Vertical Growing

What makes a squash variety actually work on a trellis? You need vining types. Bush varieties won’t climb. Avoid compact types altogether.
Moschata squashes excel here. They’re resistant to pests and disease. Musquee de Provence produces 12–20+ pound fruits. You’ll get about 3–4 fruits per vine. That’s reliable production.
Consider these proven performers: Spaghetti Squash. Tromboncino Rampicante. Butterscotch Butternut. Delicata. Cha Cha Kabocha. Winter Luxury Pie Pumpkin also works well.
Skip large pumpkins and Hubbard squash. Their weight challenges most home trellises. You’d need serious structural support.
For frequent harvests, choose varieties bred for container growing. These varieties produce smaller fruits. They mature faster. Your trellis handles them easily.
Match your variety to your trellis capacity. This prevents disappointing failures.
Direct Sow and Vertically Train Your Squash Vines

You’ll want to direct sow your squash seeds. Plant three seeds together, spacing each spot about three feet apart, and thin to one plant once they sprout and you can see which seedling looks strongest. Right from the start, use flagging tape to gently guide your young vines toward the trellis, training them upward before they spread outward and waste garden space.
Sowing Seeds Direct
How do you get squash seeds into the ground and aimed at your trellis? Direct sow your seeds three feet apart. Plant three seeds in each spot. This gives you backup seedlings. Wait until after the last frost date. Cold soil will rot your seeds.
Thin seedlings once they germinate. Keep only one vigorous plant per spot. Remove weaker seedlings by cutting them at soil level. This prevents root damage to survivors.
Position your trellis nearby before planting. You’ll want it ready for training. Space plants far enough apart for good airflow. Crowded plants invite pests and disease.
Your seedlings will emerge within one to two weeks. Young vines grow quickly. You’ll soon need to begin directing them upward toward support.
Training Vertical Growth
Once your seedlings emerge and start climbing, they’ll need guidance toward the trellis. You’re building a partnership with your plants. Here’s how to train them effectively:
- Use flagging tape to gently guide vine tendrils toward your trellis structure during early growth stages
- Secure sturdy materials like cattle panels about one foot off the ground with wire or zip ties
- Select 6-8 vigorous vines per trellis and remove ground-level growth for better ventilation
Training takes patience. Attach vines loosely so they can grow naturally. Don’t force them. As they develop, they’ll grab the trellis themselves. Remove competing ground vines regularly. This improves air circulation and reduces pest problems. You’re creating an effective vertical garden setup. Your squash plants will respond to this attention with upward growth and easier harvesting.
Use Slings to Hold Heavy Fruit as It Grows

What happens when a heavy squash gets too big for its britches? It’ll snap your vine right off the trellis. That’s where slings come in. You’ll want sturdy nylon fabric slings that cradle developing fruits and prevent them from pulling vines down. Install slings early, before fruits reach peak size, so you avoid sudden sagging later. Attach each sling to your trellis at multiple points along the fruit’s length for even weight distribution. This balanced support keeps everything secure as your squash grows outward from the stem. Check your slings weekly for fraying or wear. Replace damaged material immediately to maintain reliable support throughout the season. Combined with proper vine training, slings let you grow vertical harvests without vine damage or fruit loss.
Water Vertical Squash More Often Than Ground Plants

Because trellised squash plants sit higher off the ground and expose more leaf surface to sun and wind, they’ll dry out faster than their ground-grown cousins. You’re dealing with a plant that demands consistent moisture. Here’s what you need to know:
- Water 2–3 times weekly during growing season
- Soak deeply to push salts below roots in dry climates
- Check soil moisture daily during hot spells
Trellised plants lose deep root anchoring. This means they can’t pull water from lower soil layers like ground plants do. Plan for irrigation that reaches 8–12 inches down. Each plant needs at least 8 square feet of well-amended soil. Good air circulation around foliage reduces disease risk when you increase watering frequency. Consistent hydration prevents fruit drop. Stay vigilant during heat waves.
Keep Pests and Disease Away With Better Airflow

When you grow squash vertically on a trellis, you’re not just saving space—you’re fighting disease. Better airflow around your trellised vines dries leaves faster, which stops fungal problems like powdery mildew from taking hold, while ground-level vines stay wet and attract pests that thrive in humid conditions. Proper spacing and ventilation give you a healthier crop with fewer problems down the road.
Ventilation Reduces Fungal Issues
How much of your squash trouble stems from poor air circulation? You’d be surprised. Trellising fixes this problem by improving airflow around your plants.
Better ventilation provides these benefits:
- Reduces leaf moisture that fungal spores love to colonize
- Speeds up foliage drying after rain or watering sessions
- Eliminates humid microclimates where fungi develop and spread
A well-designed trellis keeps your vines properly spaced. Air moves freely between plants and fruits. You’ll notice leaves dry faster. That matters because wet foliage invites powdery mildew and other fungal diseases.
Prune excess leaves strategically. Remove crowded growth. These simple actions enhance ventilation further. You’re creating an environment where fungi struggle to survive. Your squash stays healthier. You spend less time fighting disease.
Ground Vines Attract Pests
Ground-level squash vines create pest problems you’ll want to avoid. Squash vine borers and cucumber beetles thrive in dense ground growth where they easily access your plants. When you elevate fruit on a trellis, you remove the pest highway that runs along the soil.
Ground vines also harbor squirrels and chipmunks that target fruit sitting directly on earth. You’ll reduce pest pressure by spacing and pruning ground vines to maintain airflow. This ventilation discourages pests from climbing upward into your canopy.
Consider using fruit hammocks or shade cloth under the trellis to keep fruit suspended above soil. Bagging young squash with netting adds extra protection against ground-dwelling creatures. These practical steps create a pest-resistant growing system used by successful gardeners.
Prune Your Vertical Squash for Maximum Light and Ventilation

Why does crowded foliage spell trouble for vertical squash? Dense leaves trap moisture. They block airflow. Disease spreads faster in humid conditions.
Dense foliage traps moisture and blocks airflow, allowing disease to spread faster in humid conditions.
Pruning solves this problem. You’re removing the obstacles between your squash and success. Here’s what you’ll do:
- Strip bottom leaves and side shoots to direct growth upward along your trellis
- Remove extra vertical growth at the base to prevent overcrowding and maintain ventilation
- Space developing fruits with good airflow around each one to reduce disease risk
Train 6–8 vines per trellis from one vigorous plant. Secure them at intervals with flagging tape. Keep stems aligned properly.
Good ventilation means even light exposure. Your squash gets healthier. Fruits develop better. You’ll notice fewer fungal problems in your garden. That’s the payoff for strategic pruning.
Know When Your Squash Is Ripe and Ready to Pick

Timing your harvest right separates mediocre squash from storage-ready winners. You’ll know your butternut is harvest-ready when the skin turns tan and resists puncture from your fingernail. Press hard—if your nail leaves no mark, you’re good to go.
For trellised squash, plan your harvest before September 1st. This timing prevents frost damage and gives you larger, mature fruits. Use sharp pruning shears to cut the stem, leaving about two inches attached. This extra stem reduces bruising and extends storage life.
After picking, cure your squash in a warm, dry room for several days. This hardens the skin further. Then move it to cool storage at 55–60°F. Your squash will last through winter.
Cure and Store Harvested Squash for Long-Term Keeping

Once you’ve picked your squash with two inches of stem intact, you’re halfway to winter storage success. Curing converts your trellis harvest into long-term keepers. Here’s what you need to do:
- Place squash in a warm, dry room for 10-14 days
- Maintain temperatures around 80-85°F for optimal curing
- Ensure good air circulation to prevent moisture buildup
After curing finishes, move your squash to cool storage at 55-60°F. This temperature range extends shelf life and preserves flavor. Proper curing hardens the skin and heals minor cuts from harvest. Your butternut squash will maintain quality for months when stored correctly. Storage done right means enjoying your vertical trellis harvest well into winter.